
Tour of the settings page
All of WC Currency Switch’s settings live on one page, WooCommerce > Currency Switch, split into twelve tabs. This tour walks through each tab so you know where to find things. For example, if a shopper says PayPal is missing when they pay in KWD, you will know to look on the Payments tab, and if prices end in odd decimals, you will look on Pricing.
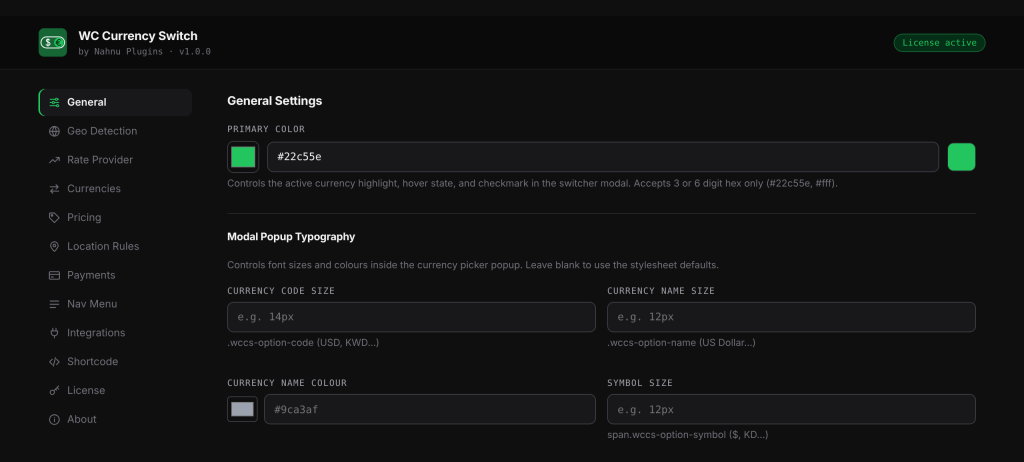
How the page works#
- Click a tab name to open that tab.
- The header shows the plugin version and a badge that reads License active or No license active.
- One Save Changes button at the bottom of the page saves every tab at once. You see Settings saved when it worked. You can switch between tabs before saving.
- A few buttons act straight away and do not need Save Changes: Force Refresh, Download CSV, Copy on the Shortcode tab, and the buttons on the License tab.
While the plugin is active, the Currency, Currency position and Number of decimals fields are removed from WooCommerce > Settings > General, with a note that links here. You set them in this page instead.
General#
The General tab holds the settings that affect the whole store:
- Primary Color and Modal Popup Typography: the highlight colour and text sizes and colours of the switcher popup.
- Switcher Button Defaults: border and text colour used by
[wccs_switcher]when the shortcode does not set its own. - Default Currency: your store currency, also called the base currency. Saving it also sets the WooCommerce store currency. Existing product prices are not converted.
- Cookie Name and Cookie Lifetime (days): the cookie that remembers each shopper’s currency (
wccs_currency, 30 days by default). - Behaviour: Auto-detect currency on first visit, Show search bar in modal and Modal Width (700px by default; phones always get a full-width panel).
- Switching Mode: Reload (recommended), the default, or Instant, which is in beta.
- Checkout: Lock currency at checkout, Settle orders in base currency and Change currency follow.
- Data: Remove all data when the plugin is deleted.
The tab ends with a short list of the shortcodes and a note on right-to-left language support.
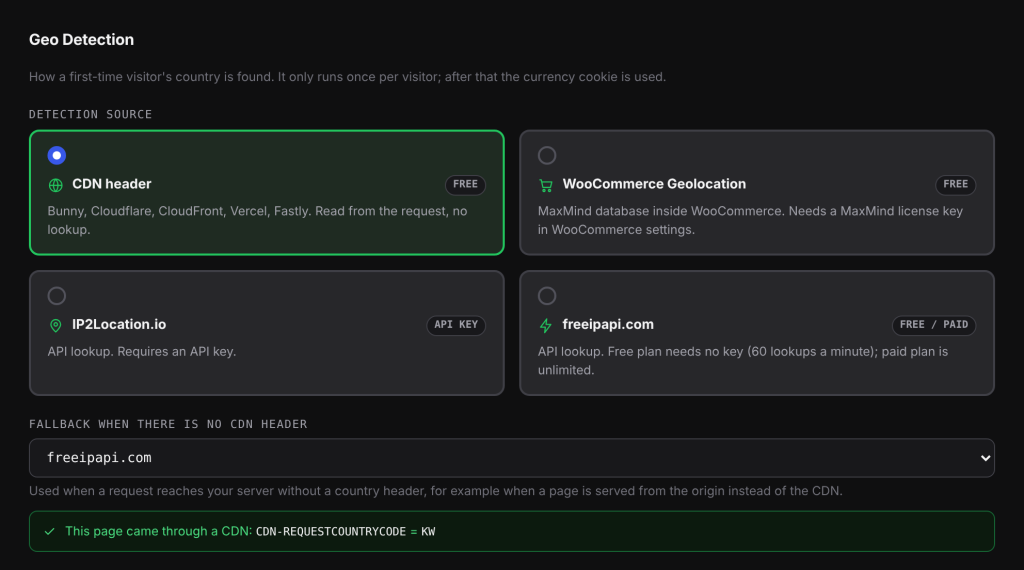
Geo Detection#
Choose how a first-time visitor’s country is found: CDN header (the default, which reads the country your CDN, or content delivery network, adds to each request), WooCommerce Geolocation, IP2Location.io or freeipapi.com. With CDN header you also pick a Fallback when there is no CDN header. The tab tells you whether the page you are on arrived with a CDN country header.
Rate Provider#
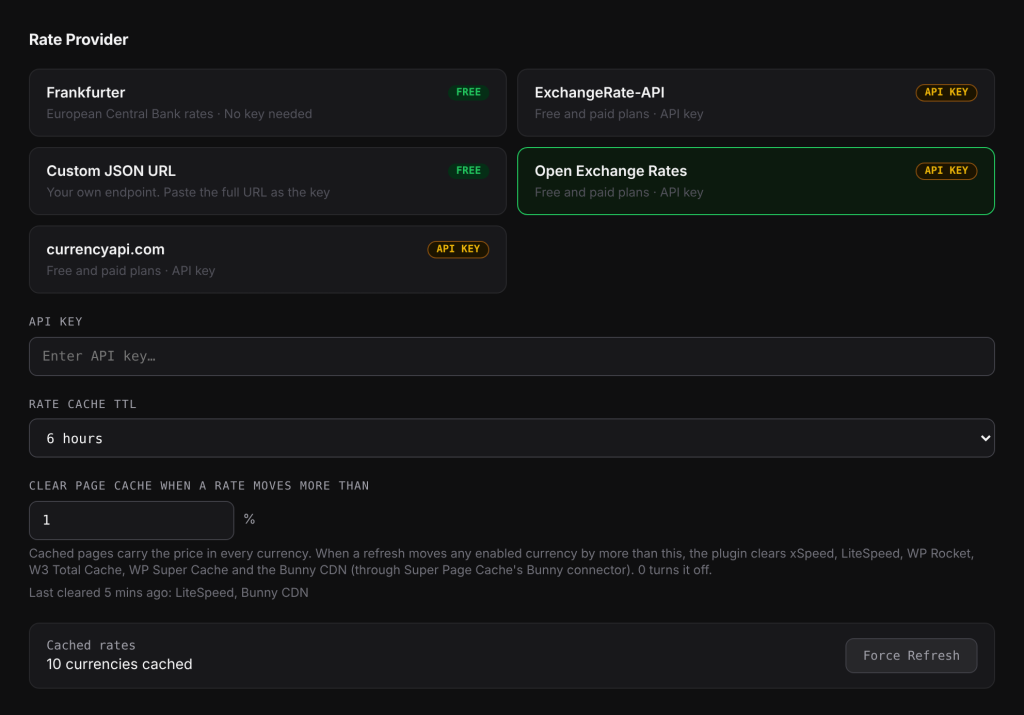
Pick where exchange rates come from (Frankfurter by default) and enter an API Key if the provider needs one. Here you also set:
- Rate Cache TTL: how long rates are kept before new ones are fetched: 1, 6 (default), 12 or 24 hours.
- Clear page cache when a rate moves more than: 1% by default; 0 turns it off.
- Force Refresh: fetch new rates now.
- Rate History: Keep history for (90 days by default) and Download CSV.
- Rate Update Notifications: Email me when rates are manually refreshed and Notification Email.
Currencies#
Turn currencies on and off. Search to add one, click Remove to take one away, and drag rows to set the order shoppers see. Your store currency is marked Store currency and cannot be removed.
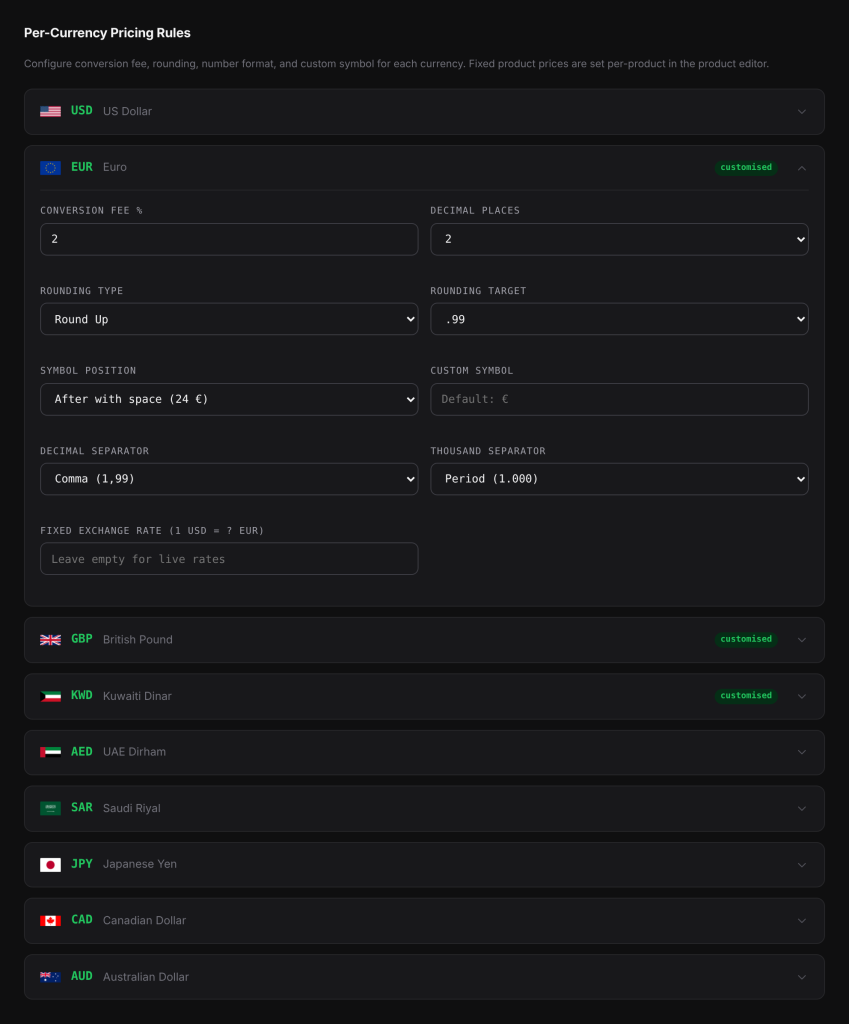
Pricing#
Each enabled currency has its own panel. Click it to expand. You can set Conversion Fee %, Decimal Places, Rounding Type, Rounding Target, Symbol Position, Custom Symbol, Decimal Separator, Thousand Separator and a Fixed Exchange Rate. Your store currency’s panel has only the format settings (decimals, separators, symbol position and custom symbol), because it is never converted. A panel with a fee, rounding, custom symbol or fixed rate shows a customised label.
Fixed prices for single products are not set here. You set them in the product editor, in the Currency Fixed Prices box.
Location Rules#
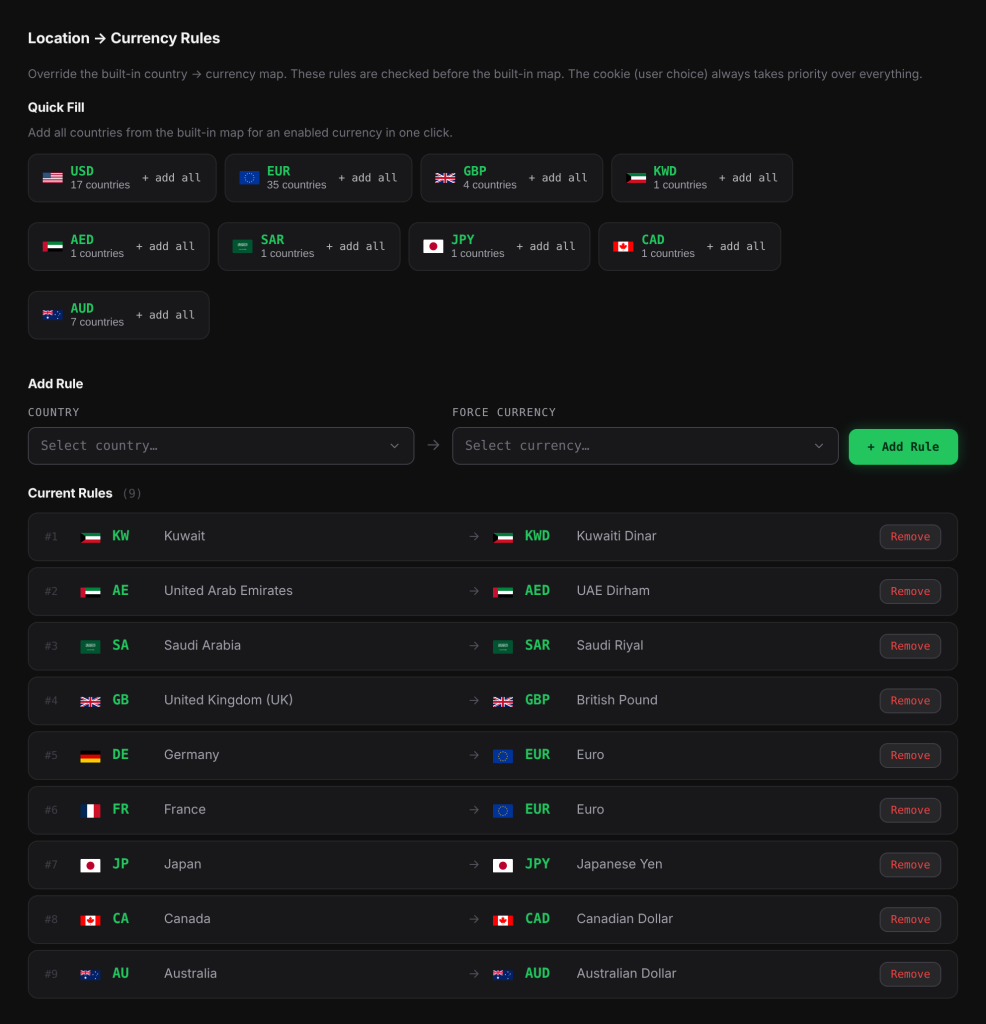
Location → Currency Rules let you override the built-in country map, for example to show USD to visitors from Canada. Quick Fill adds, in one click, every country that the built-in map links to one of your enabled currencies. Language → Currency Rules set a currency per language when Polylang or TranslatePress is active.
Payments#
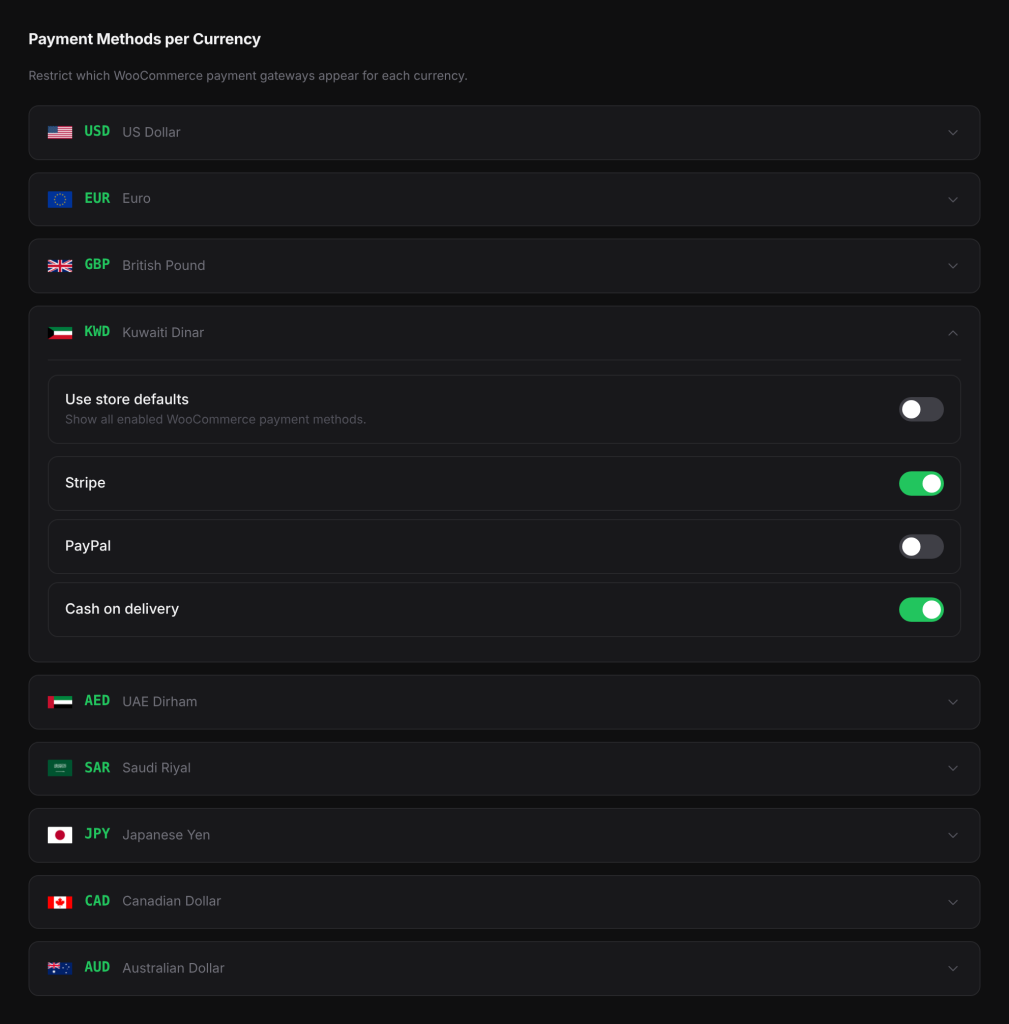
Each enabled currency has a panel. With Use store defaults on, every enabled WooCommerce payment method shows for that currency. Turn it off to choose the methods one by one.
Nav Menu#
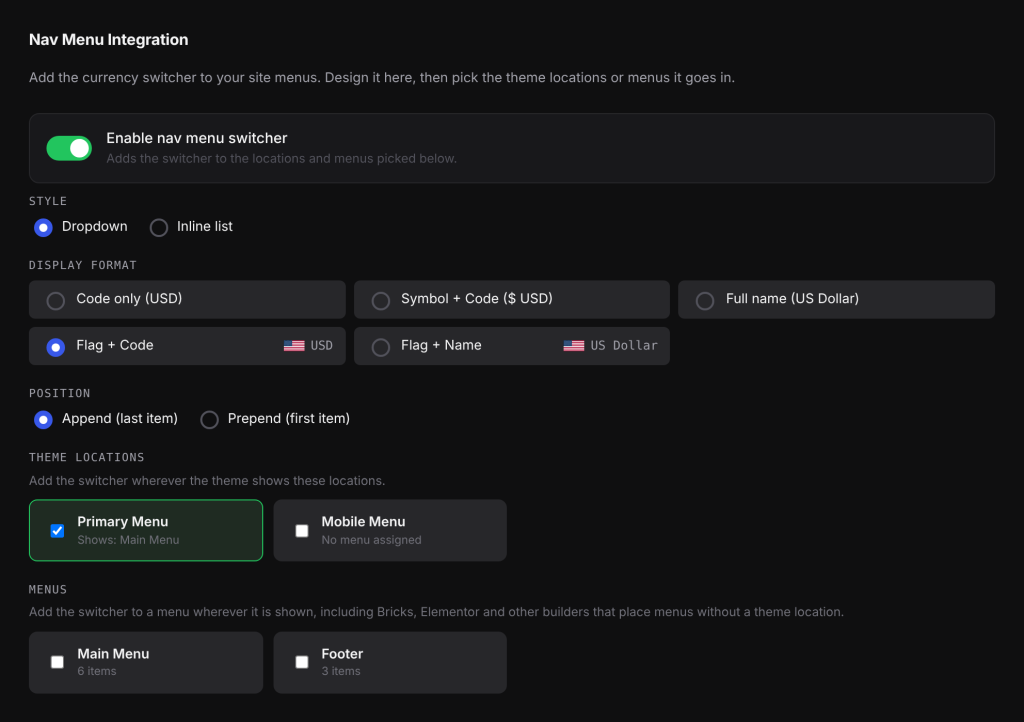
Add the switcher to your site menus. Turn on Enable nav menu switcher, then choose the Style (Dropdown or Inline list), the Display format, the Position and the Theme locations or Menus it goes in.
Integrations#
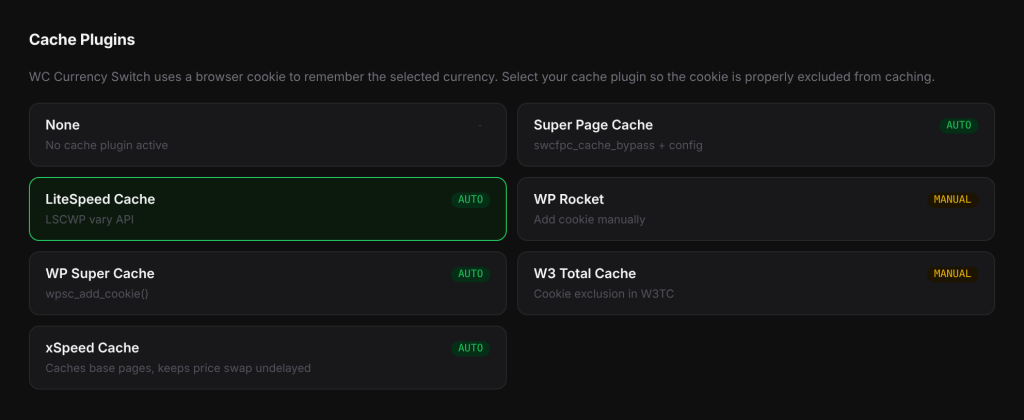
At the top, Cache Plugins lets you pick the page cache plugin you use, so the plugin can set it up for you (marked AUTO) or tell you what to add yourself (marked MANUAL). Below that are notes on cookie consent banners, and a status card for each supported plugin, page builder and theme, grouped under Multi-language, WooCommerce Add-ons and Page Builders & Themes. Each card says INTEGRATION ACTIVE, ACTIVE (NATIVE) or NOT INSTALLED. The last list, Checked: No Integration Available, names plugins that were checked and are not supported.
Shortcode#
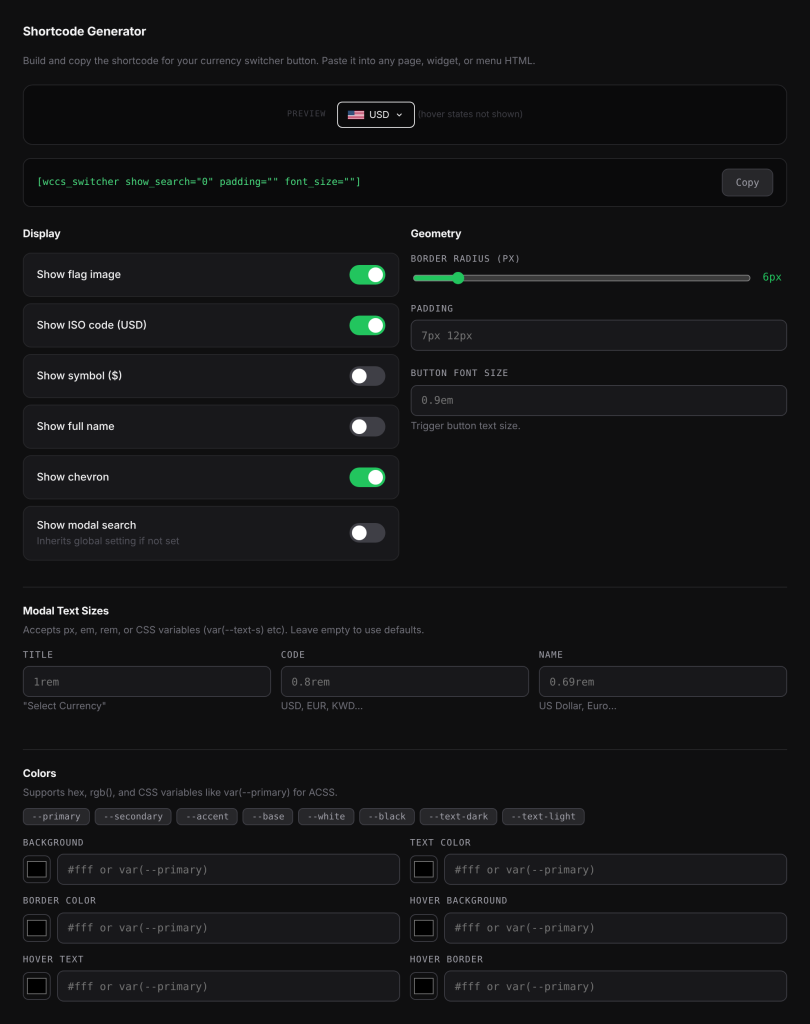
The Shortcode Generator builds a [wccs_switcher] shortcode for you. Change the display, size and colour options, watch the Preview, then click Copy and paste the shortcode where you want the switcher.
License#
Activate your license key to get automatic updates. The tab shows your plan, its status and how many sites use it, with Refresh and Deactivate License buttons once a license is active.
About#
The plugin version, a short description of what it does, the minimum WordPress, PHP and WooCommerce versions, and links to wccurrencyswitch.com and nahnuplugins.com.
Good to know#
- Only users who can manage WooCommerce (Administrators and Shop Managers in a standard setup) can open this page.
- If you add a currency on the Currencies tab, its panels appear on Pricing and Payments straight away, before you save.
Related docs#
- Quick start: sell in a second currency in 10 minutes
- Setting the default currency
- Activating your license
- Shortcode generator and styling options